Skip to main content
Menu
Home
About Us
About Us Overview
Dr. Scott Miller
Meet Dr. Scott Miller
In the Media
Authentic Beauty
Practice Philosophy
Meet the
Miller Cosmetic Surgery
Team
Our Center
Video Library
Face
Face Procedures Overview
Facelift & Neck Lift
Facial Implants
Rhinoplasty
Eyelid Surgery
Brow Lift (Forehead Lift)
Lip Lift
Skin Cancer Reconstruction
Breast
Breast Procedures Overview
Breast Augmentation & Implants
Breast Lift
Breast Lift with Implants
Breast Reduction
Body
Body Procedures Overview
Liposuction
Tummy Tuck (Abdominoplasty)
Mommy Makeover
Non-Surgical
Non-Surgical Procedures Overview
Sofwave™ Skin Regeneration and Cellulite Reduction
Laser Skin Resurfacing and Microneedling
Facial Fillers
JUVÉDERM
RHA
®
Collection by Revance
®
Aesthetics
Neurotoxins
BOTOX
®
Cosmetic and Dysport
®
DAXXIFY
®
Frown Line Treatment
Jeuveau™
Skin Care
For Men
For Men Procedures Overview
Facial Plastic Surgery for Men
Male Breast Reduction-Gynecomastia
Body Contouring for Men
Gallery
Reviews
Online Reviews
Patient Stories
For Patients
For Patients Overview
Financing Options
FAQs
TouchMD
News Room
Blog
Travel Program
Contact Us
858.453.3133
Scott R. Miller MD, FACS Board Certified Plastic Surgeon
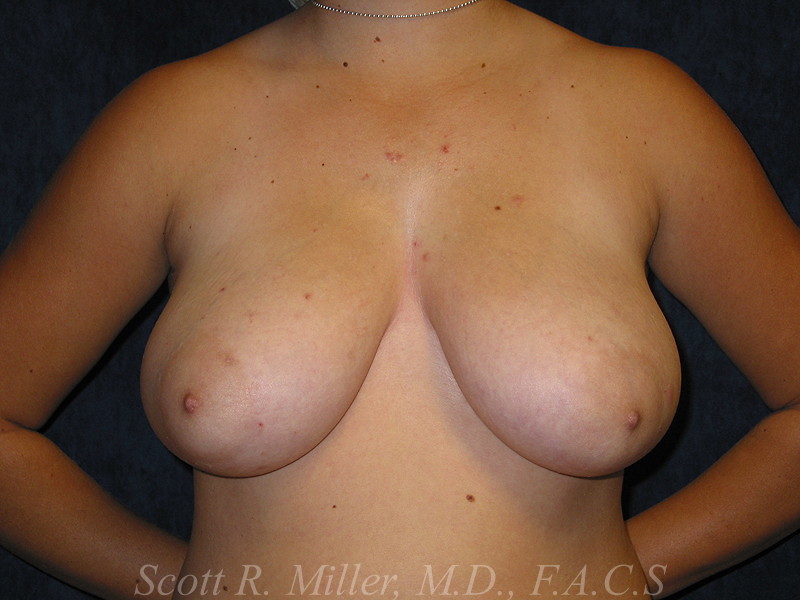
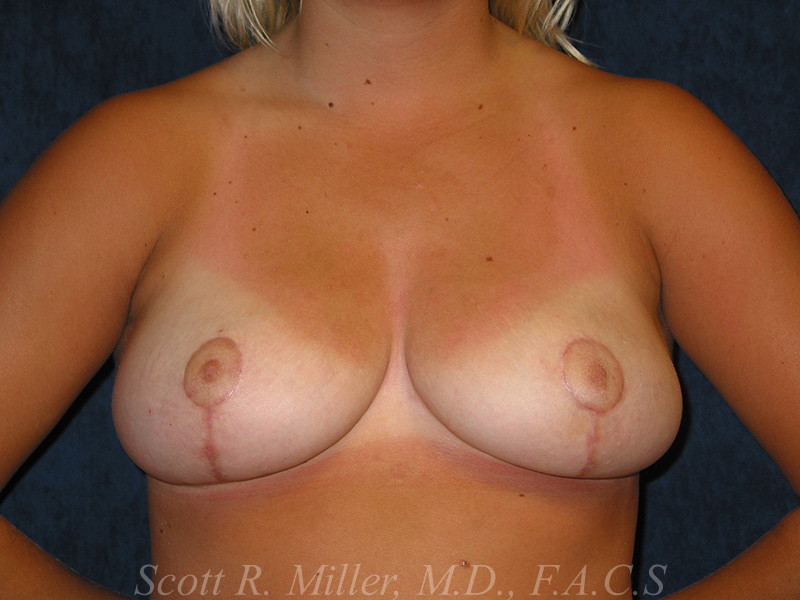
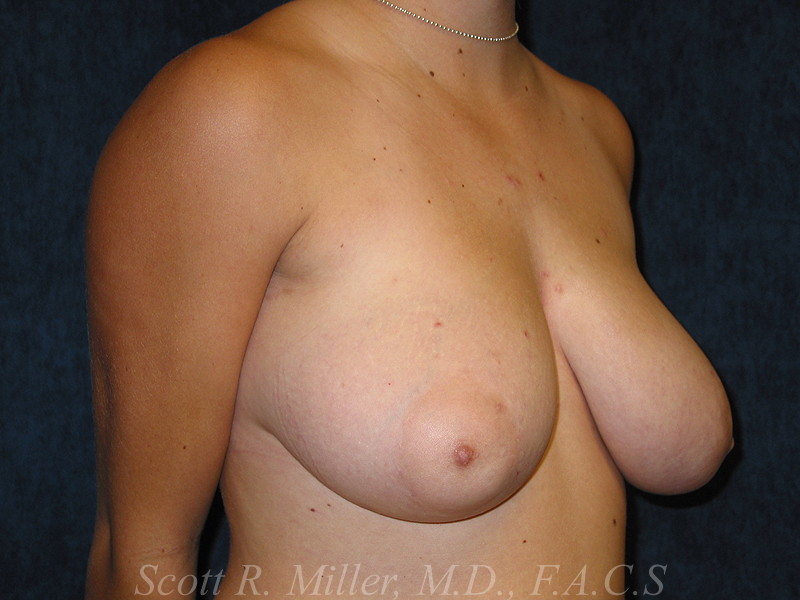
Breast Reduction Gallery
Home
/
Gallery
/
Breast Reduction
/
Patient 2
Patient 2
Back to Gallery
Previous
Next
Stay Connected
Follow Us On Instagram
Please ensure Javascript is enabled for purposes of
website accessibility